
Overview

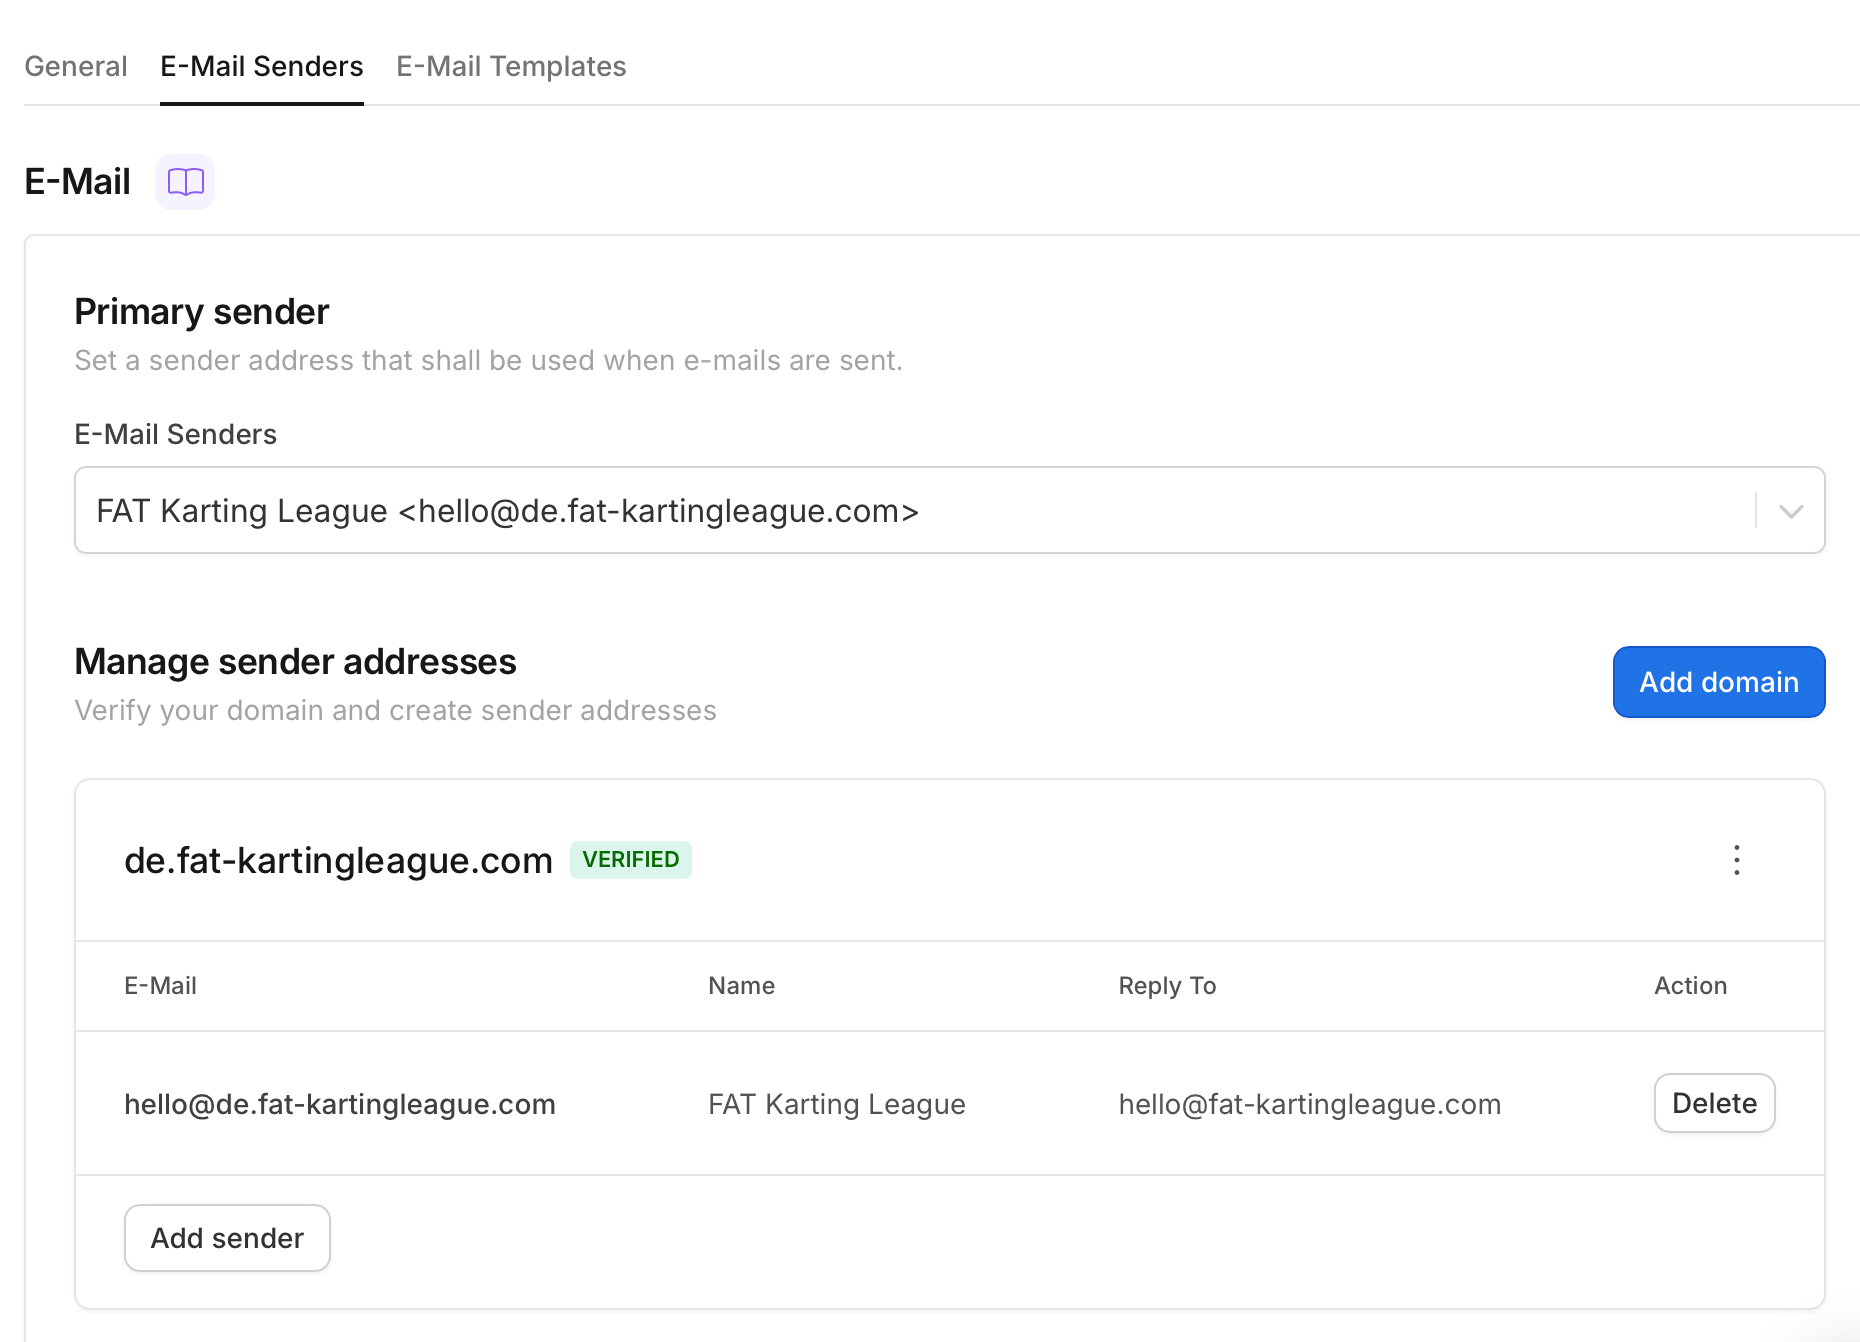
Vivenu sends customer emails from a verified sender domain. This SOP covers adding a branded email domain to the seller, verifying ownership through DNS records in GoDaddy, creating the hello sender, and setting it as the primary sender.
This SOP assumes you already know how to access and navigate Vivenu. If you need access, email support.

Prerequisites

  • Vivenu access for the relevant seller
  • Access to the fat-kartingleague.com DNS in GoDaddy
  • The hub code confirmed (e.g. de for Germany, us-ca for US California). See the naming convention for how hub codes are assigned.

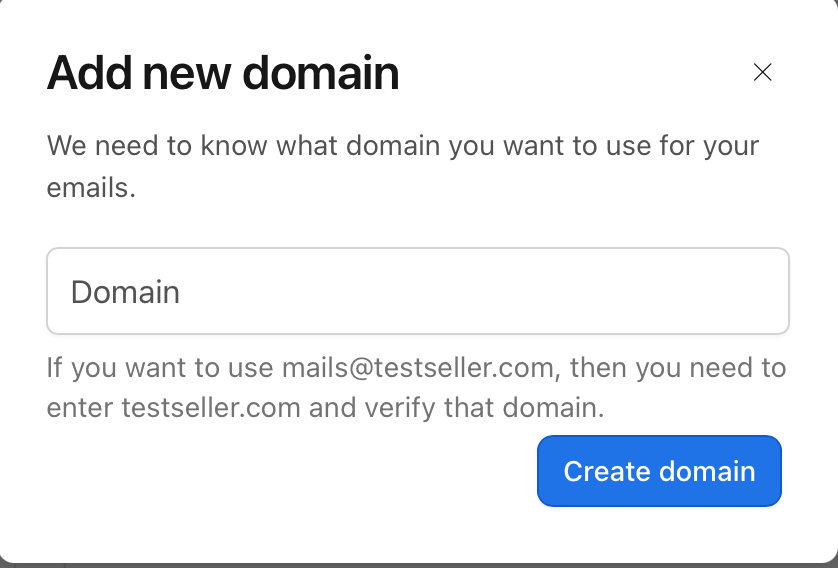
Adding the Email Domain

1

Open E-Mail Senders

Navigate to Settings > Communication > E-Mail Senders.
2

Add the domain

Under Manage sender addresses, click Add domain and enter the domain using the convention:
<hub-code>.fat-kartingleague.com
Where <hub-code> is the code for your hub. For example, for Germany this is de.fat-kartingleague.com.Click Create domain.The Add new domain dialog in Vivenu

Verifying the Domain

The new domain shows as VERIFICATION PENDING until its DNS records are added and verified. The unverified domain with the Verify domain button
1

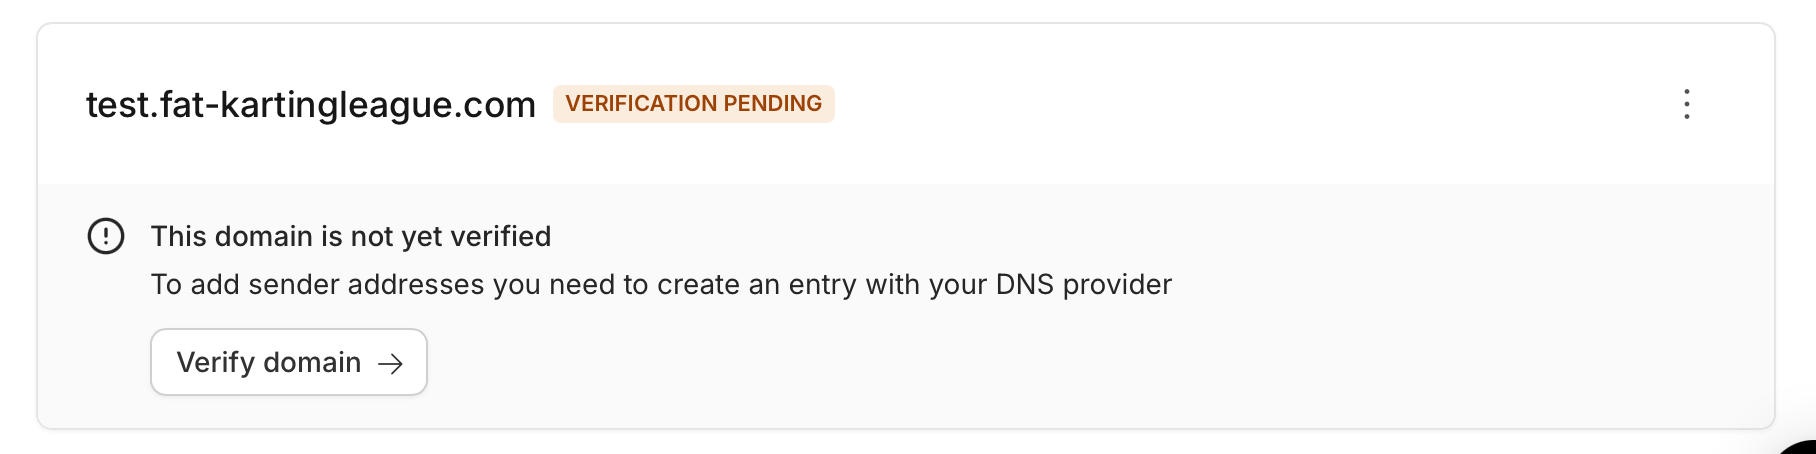
Open the DNS records

Click Verify domain. Vivenu displays two records to add: a DKIM record and a ReturnPath record.The DKIM and ReturnPath DNS records shown by Vivenu
2

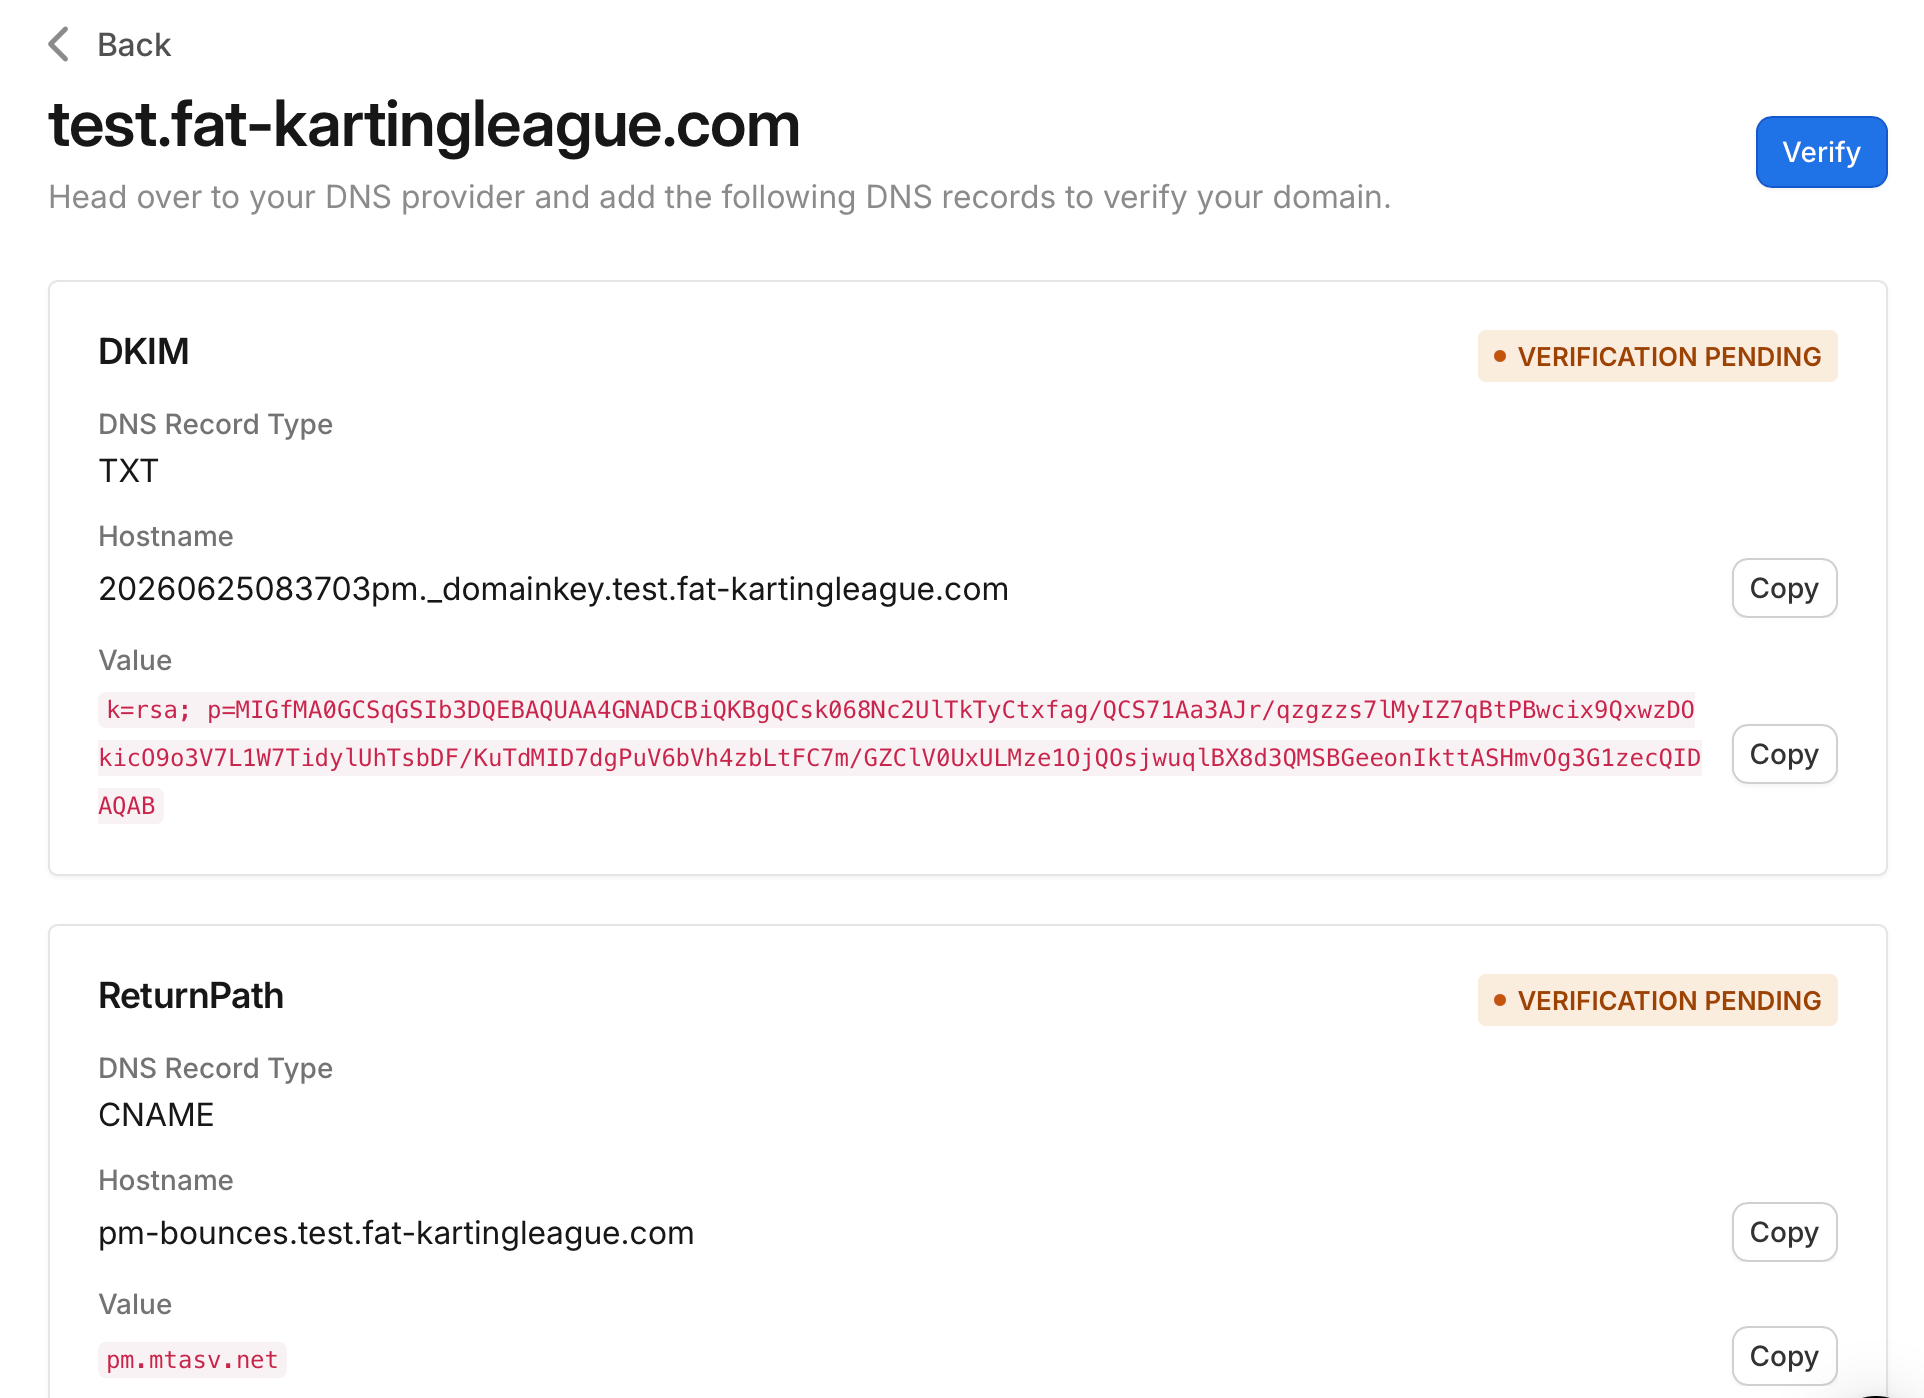
Add both records in GoDaddy

In GoDaddy, open the DNS management for fat-kartingleague.com and add both records exactly as Vivenu provides them:
RecordDNS Record TypeHostnameValue
DKIMTXT<selector>._domainkey.<hub-code>The k=rsa; p=... value from Vivenu
ReturnPathCNAMEpm-bounces.<hub-code>pm.mtasv.net
Omit the .fat-kartingleague.com part from each Hostname. GoDaddy appends the root domain automatically, so the fully qualified records resolve to <selector>._domainkey.<hub-code>.fat-kartingleague.com and pm-bounces.<hub-code>.fat-kartingleague.com.
3

Verify and wait for propagation

Back in Vivenu, click Verify to request verification. DNS changes can take time to propagate, so if verification does not succeed immediately, wait and try again until the domain shows VERIFIED.

Adding a Sender

Once the domain is verified, add a sender address within it.
1

Open the Add sender dialog

On the verified domain, click Add sender.
2

Set the sender details

Complete the fields as follows:
FieldValue
”From” E-Mailhello (the @<hub-code>.fat-kartingleague.com domain is filled automatically and cannot be changed)
“From” NameFAT Karting League
”Reply To” E-Mailhello@fat-kartingleague.com
Click Create sender.The Add new sender dialog in Vivenu

Setting the Primary Sender

1

Select the new sender

Under Primary sender, open the E-Mail Senders dropdown and change it from the default to the sender you just created.
2

Save

Click Save. The primary sender should now read FAT Karting League <hello@<hub-code>.fat-kartingleague.com>.The E-Mail Senders page with the verified domain, sender, and primary sender set
Last modified on June 29, 2026