
Creating a New Payment Gateway

1

Open Payment Gateways

Under Settings > Payments > Payment Gateways, click Create.
2

Select Stripe and name the gateway

Select Stripe as the payment provider and name the gateway Hub # Stripe, replacing # with the hub number.Click Create. You should now see the new payment gateway listed as inactive.The new payment gateway shown as inactive in the list

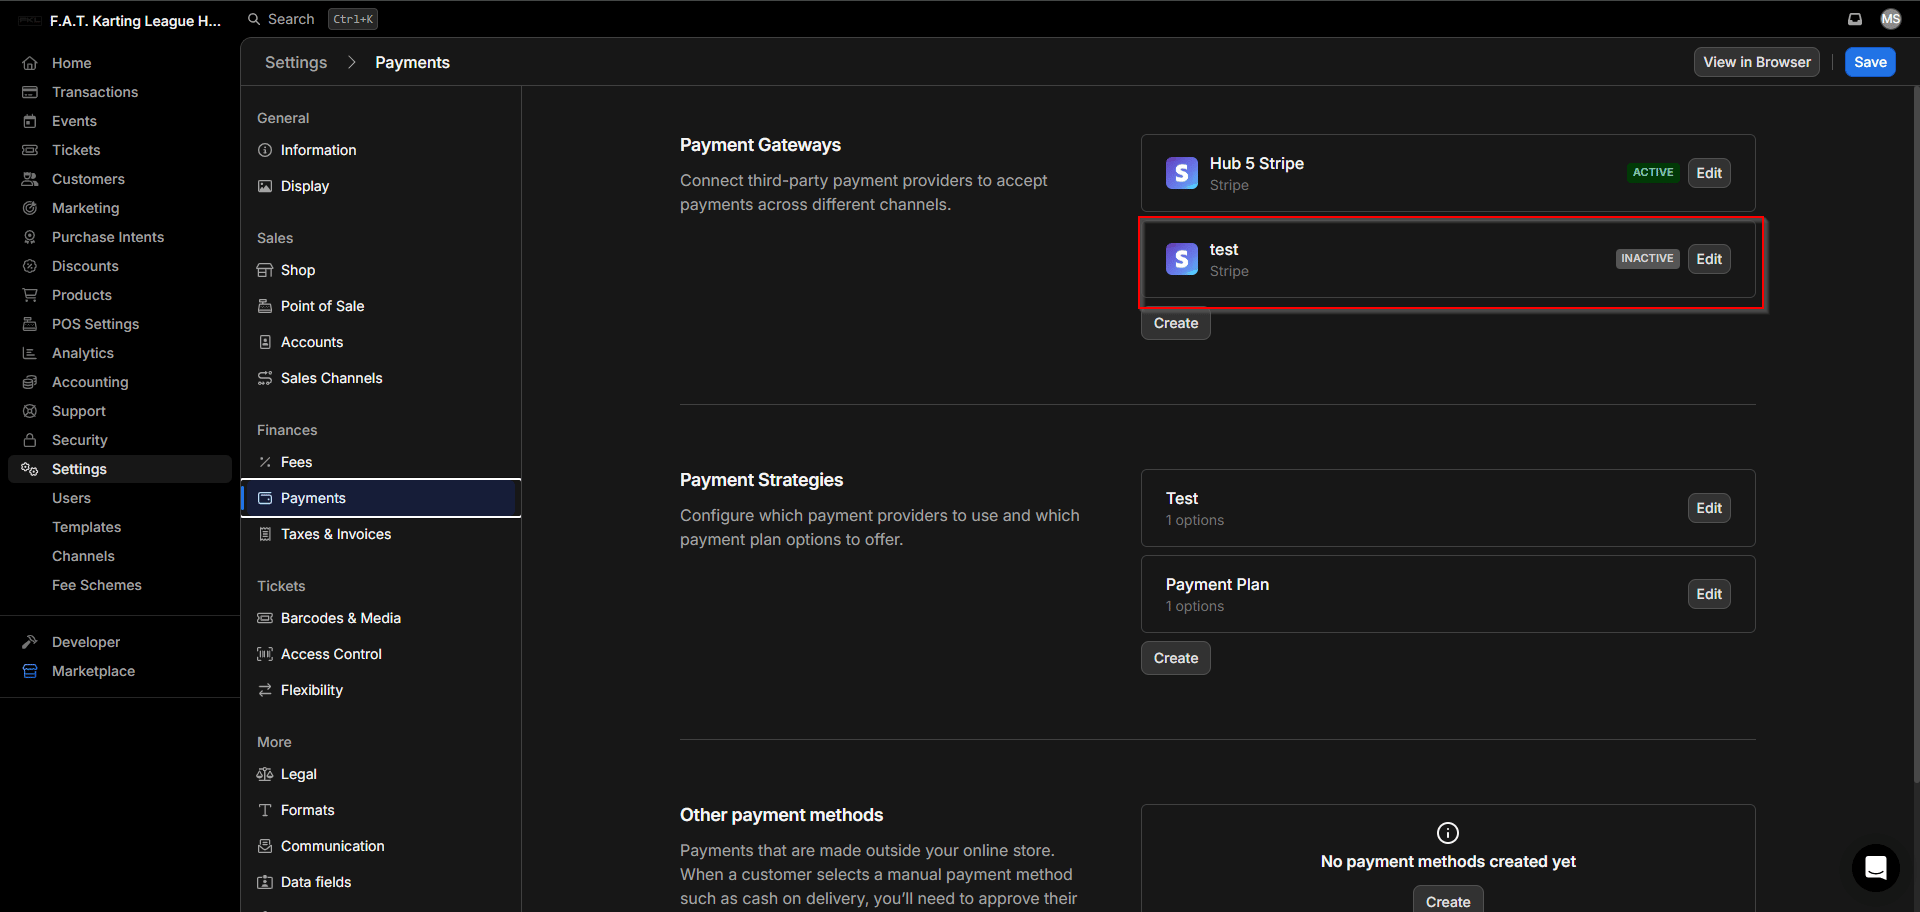
Configuring the Payment Gateway

1

Open the gateway editor

Click Edit on the inactive gateway to open the details sidebar.
2

Enable channels

Under Channel, enable all three options: Online, POS, and Recurring Payments.
3

Set the statement descriptor

Under Statement Descriptor, enter FAT Karting League.
4

Enable Klarna

Enable Klarna as a payment method.

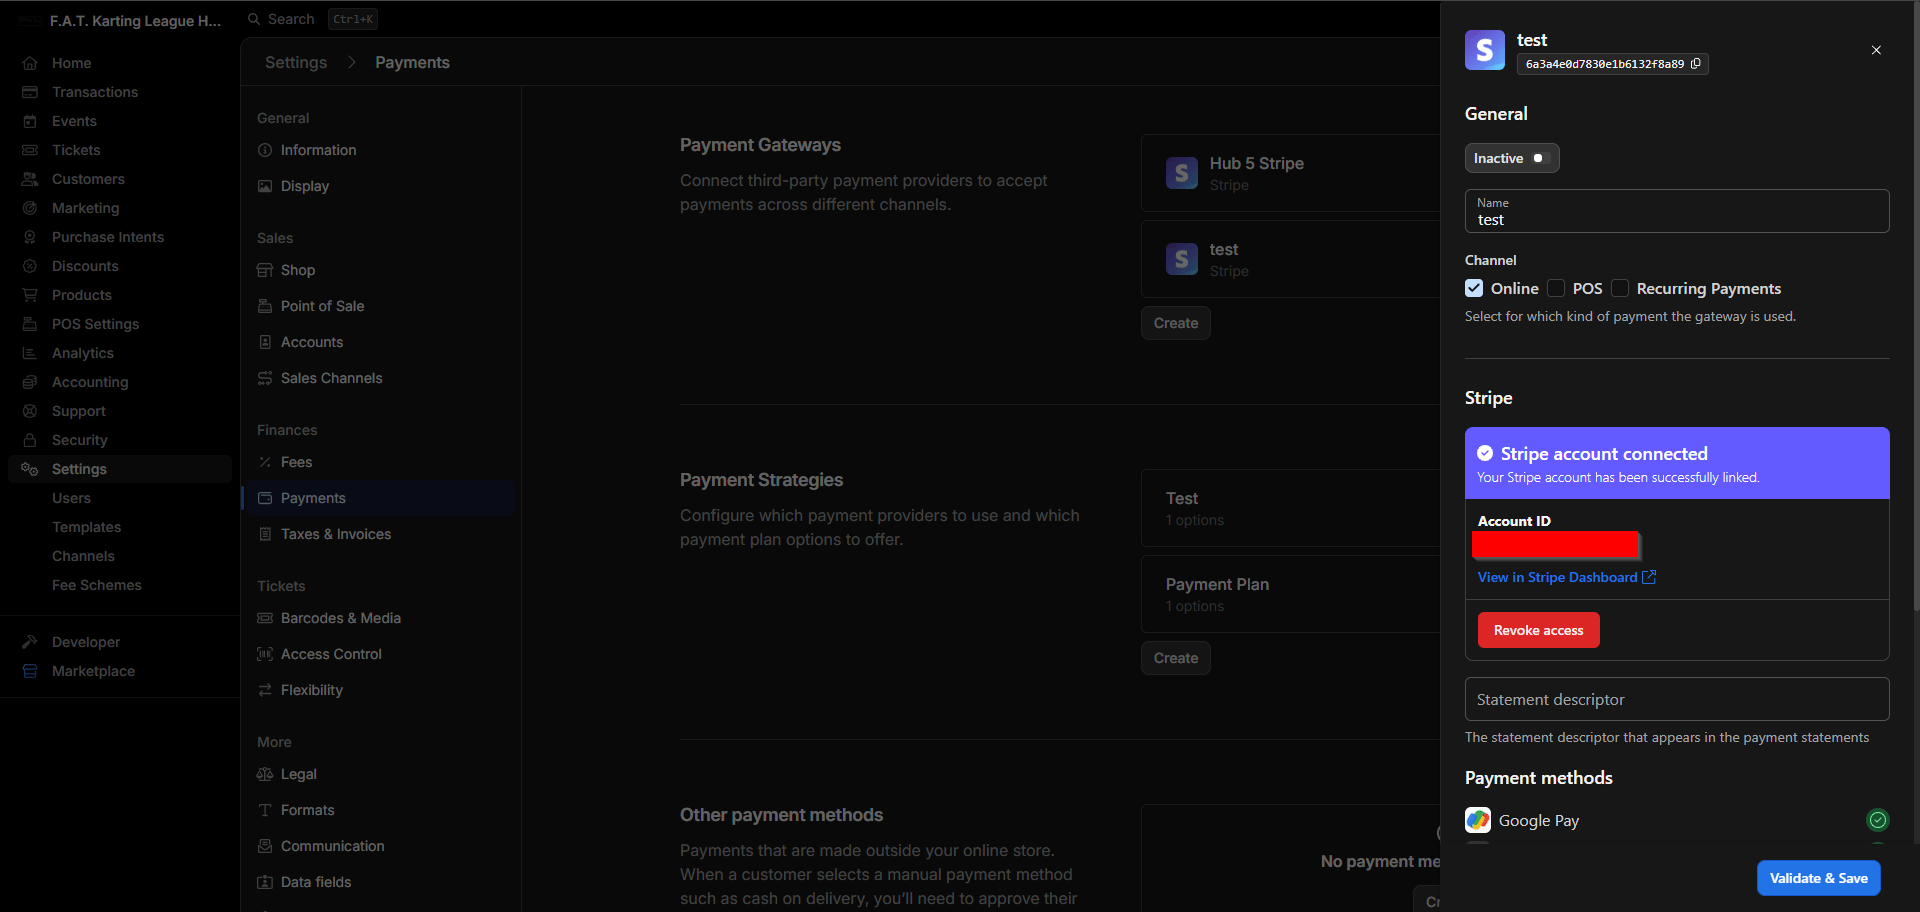
Connecting with Stripe

1

Initiate the Stripe connection

Click Connect with Stripe to be taken to the Stripe configuration page.The Connect with Stripe button on the payment gateway page
2

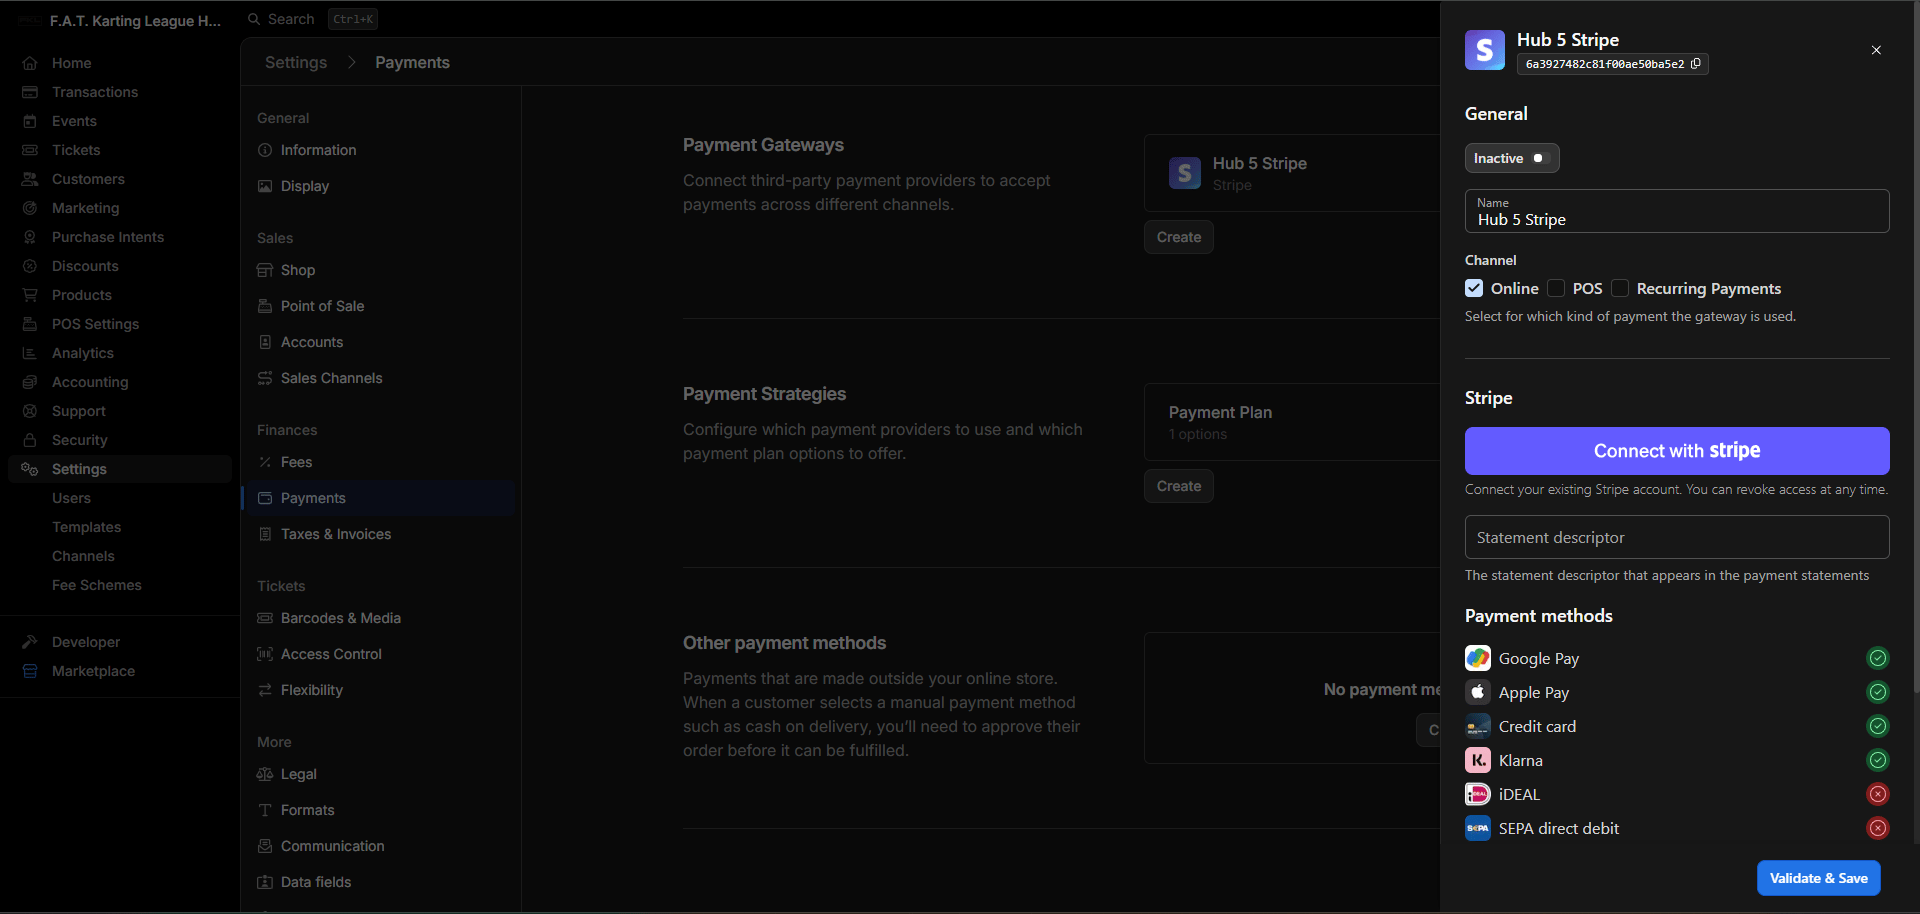
Select the correct Stripe account

Select the Stripe account relevant to the hub you are setting up and connect.
If you are unsure which Stripe account is correct for this hub, contact the finance team before proceeding.
The list of available sellers in Stripe
3

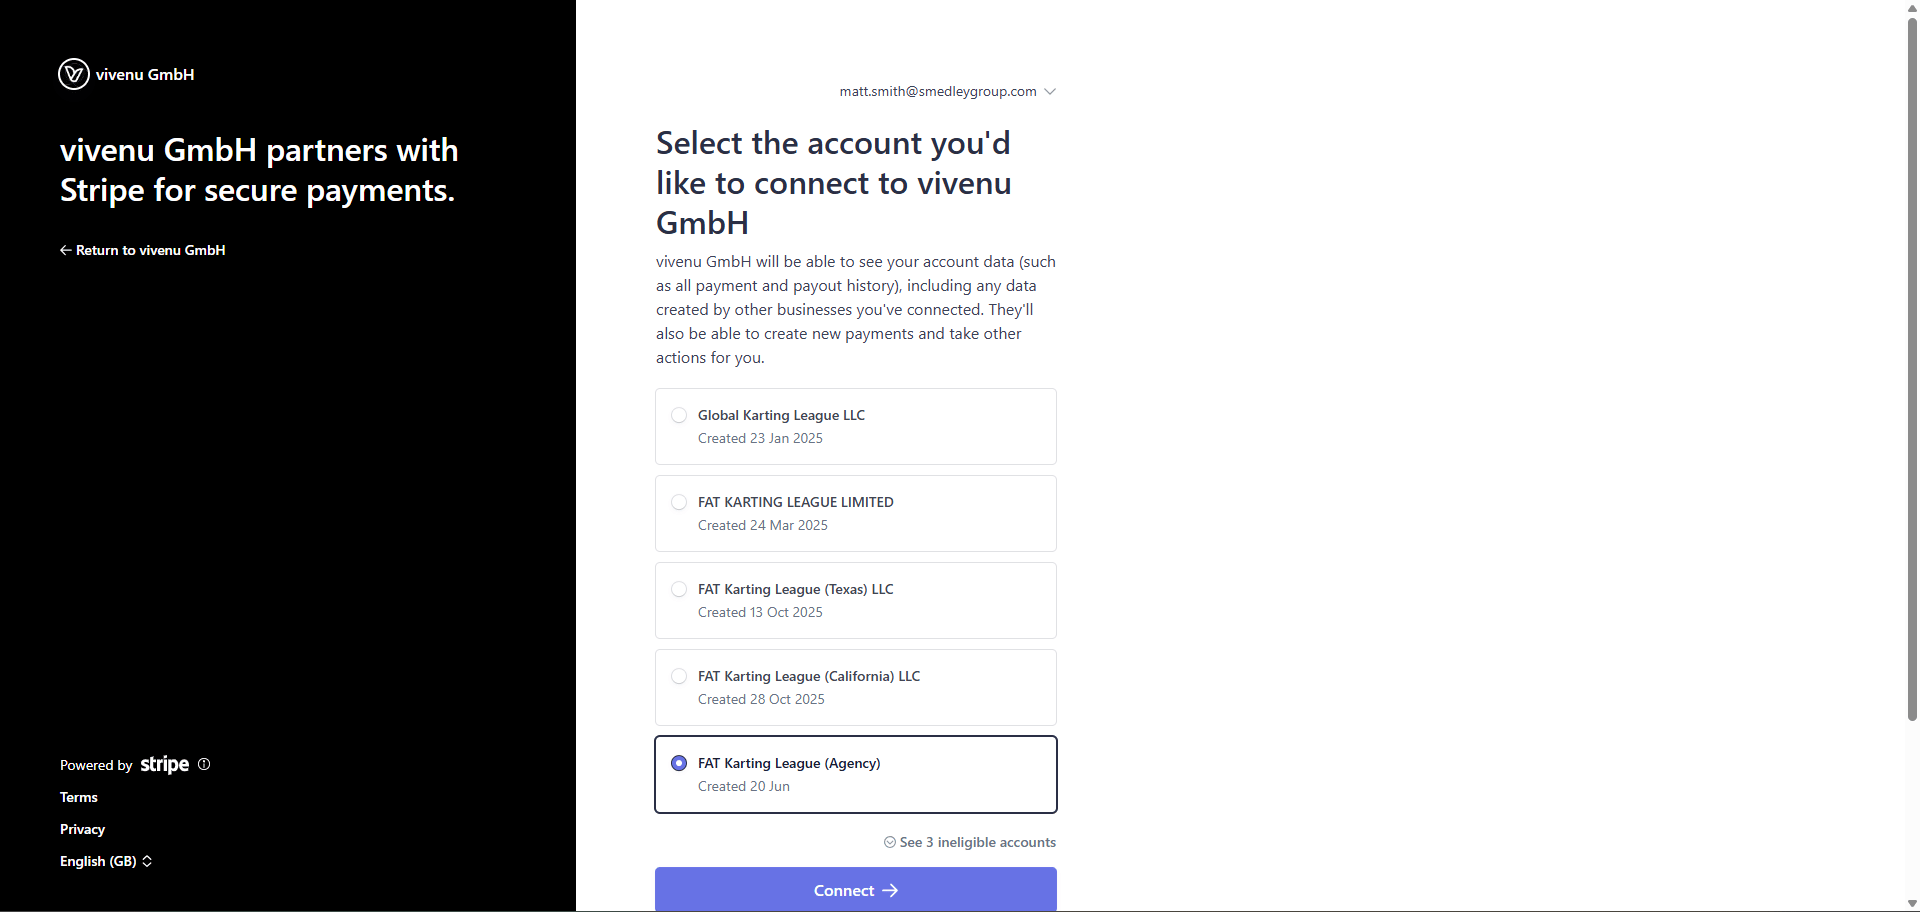
Authenticate and return to Vivenu

You will be redirected to Vivenu for authentication. Once confirmed, you will be returned to Settings > Information.
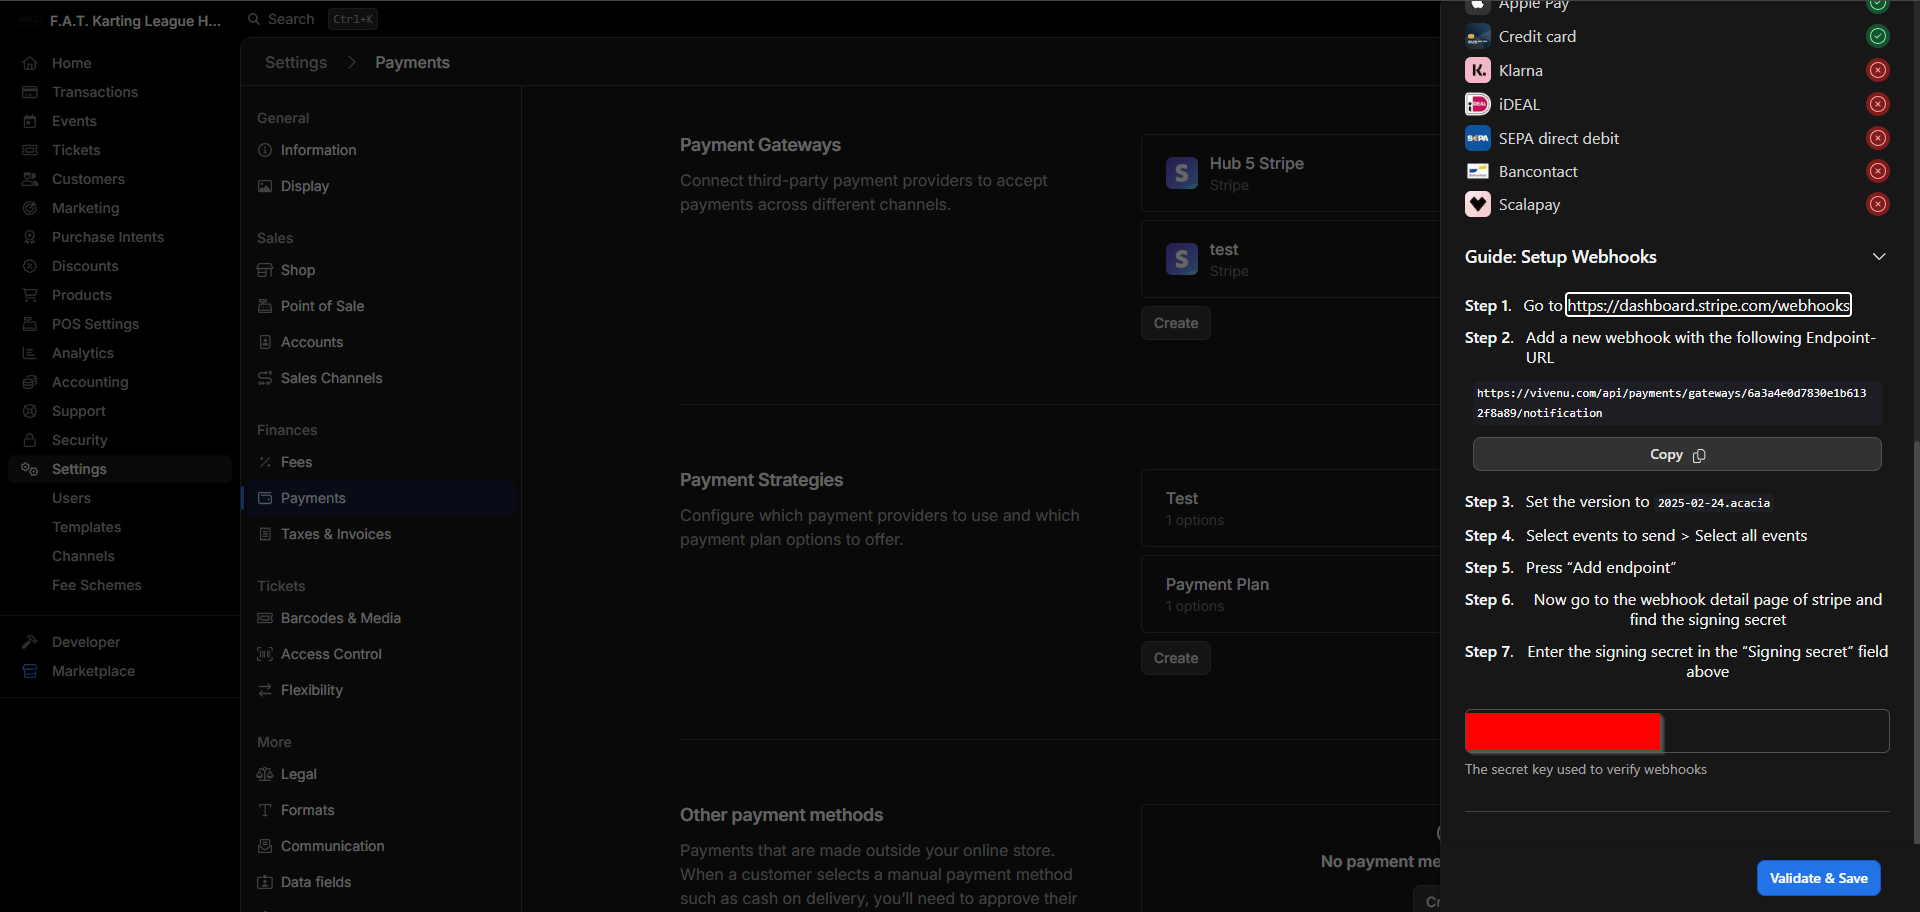
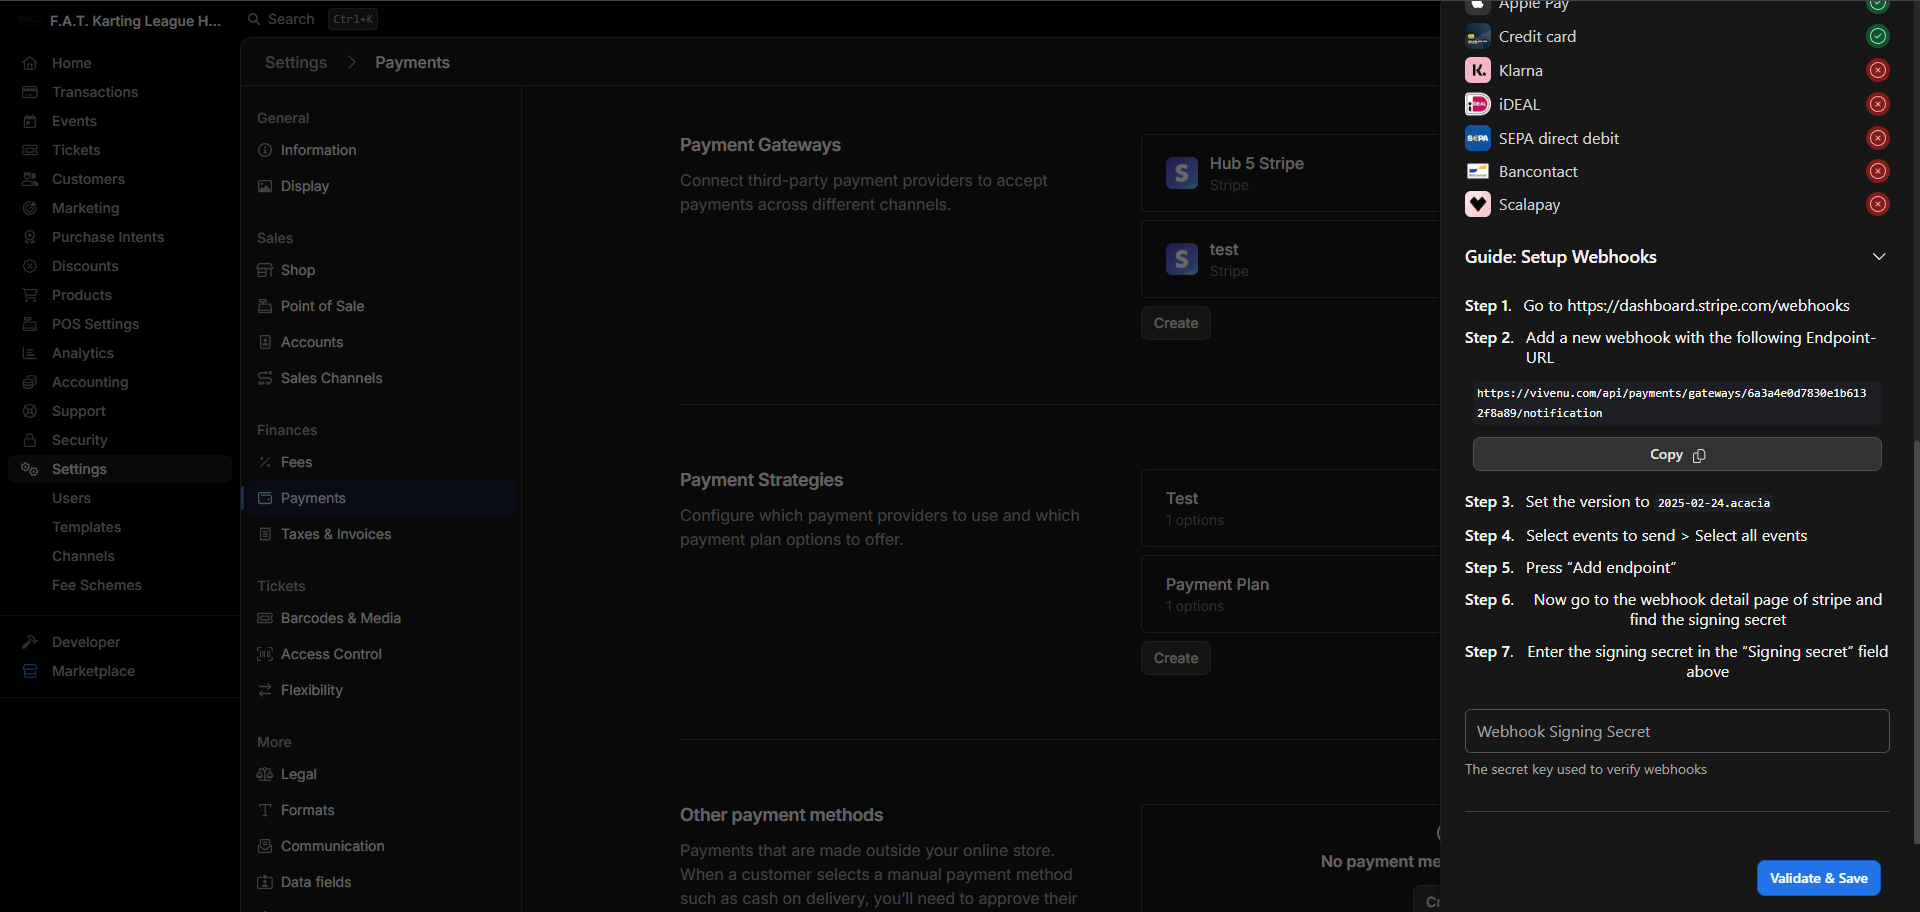
4

Verify the connection

Navigate back to the payment gateway. The Stripe account should now show as connected.The payment gateway showing the Stripe account connected

Setting Up Webhooks

The webhook instructions shown within Vivenu may be out of date. Follow this SOP rather than the guidance provided in the platform.
1

Open the Stripe Webhooks dashboard

2

Copy the webhook URL from Vivenu

Copying the webhook URL from Vivenu
3

Select events

Under Configure your event destination > Events, select Select all and continue.Select all event triggers on Stripe
4

Select destination type

Select Webhook endpoint and continue.
5

Acknowledge payload styles

You will see a note about payload styles. Continue through.
6

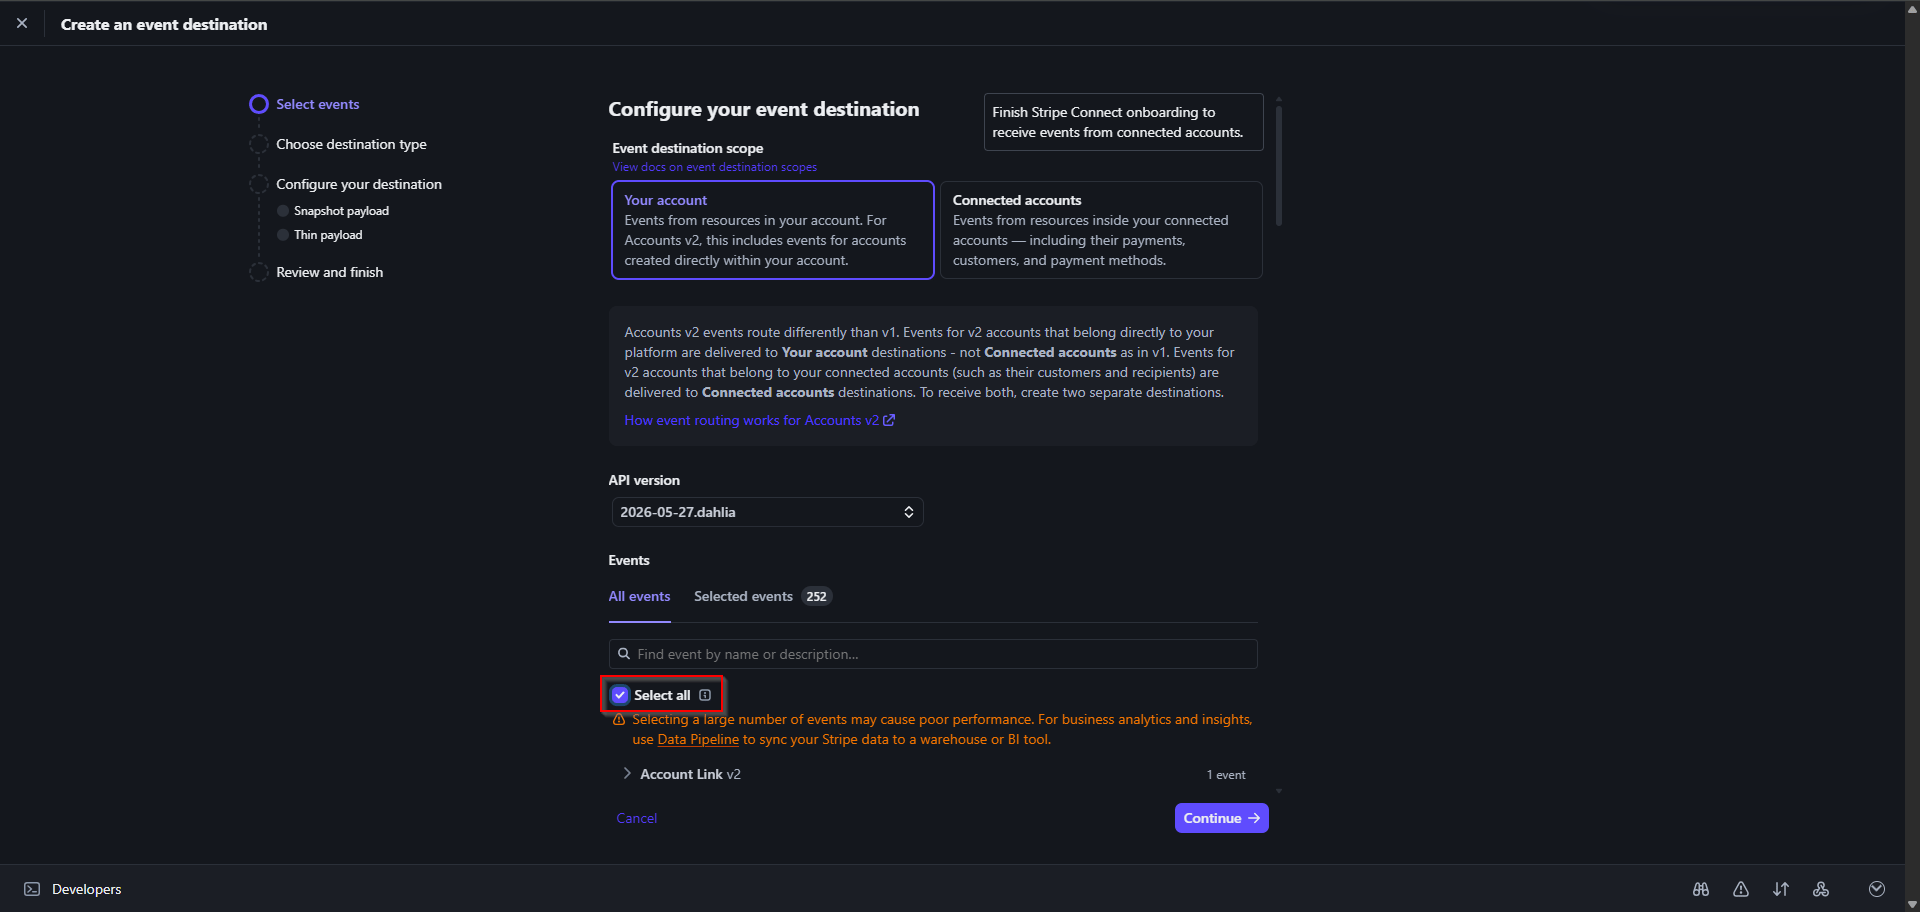
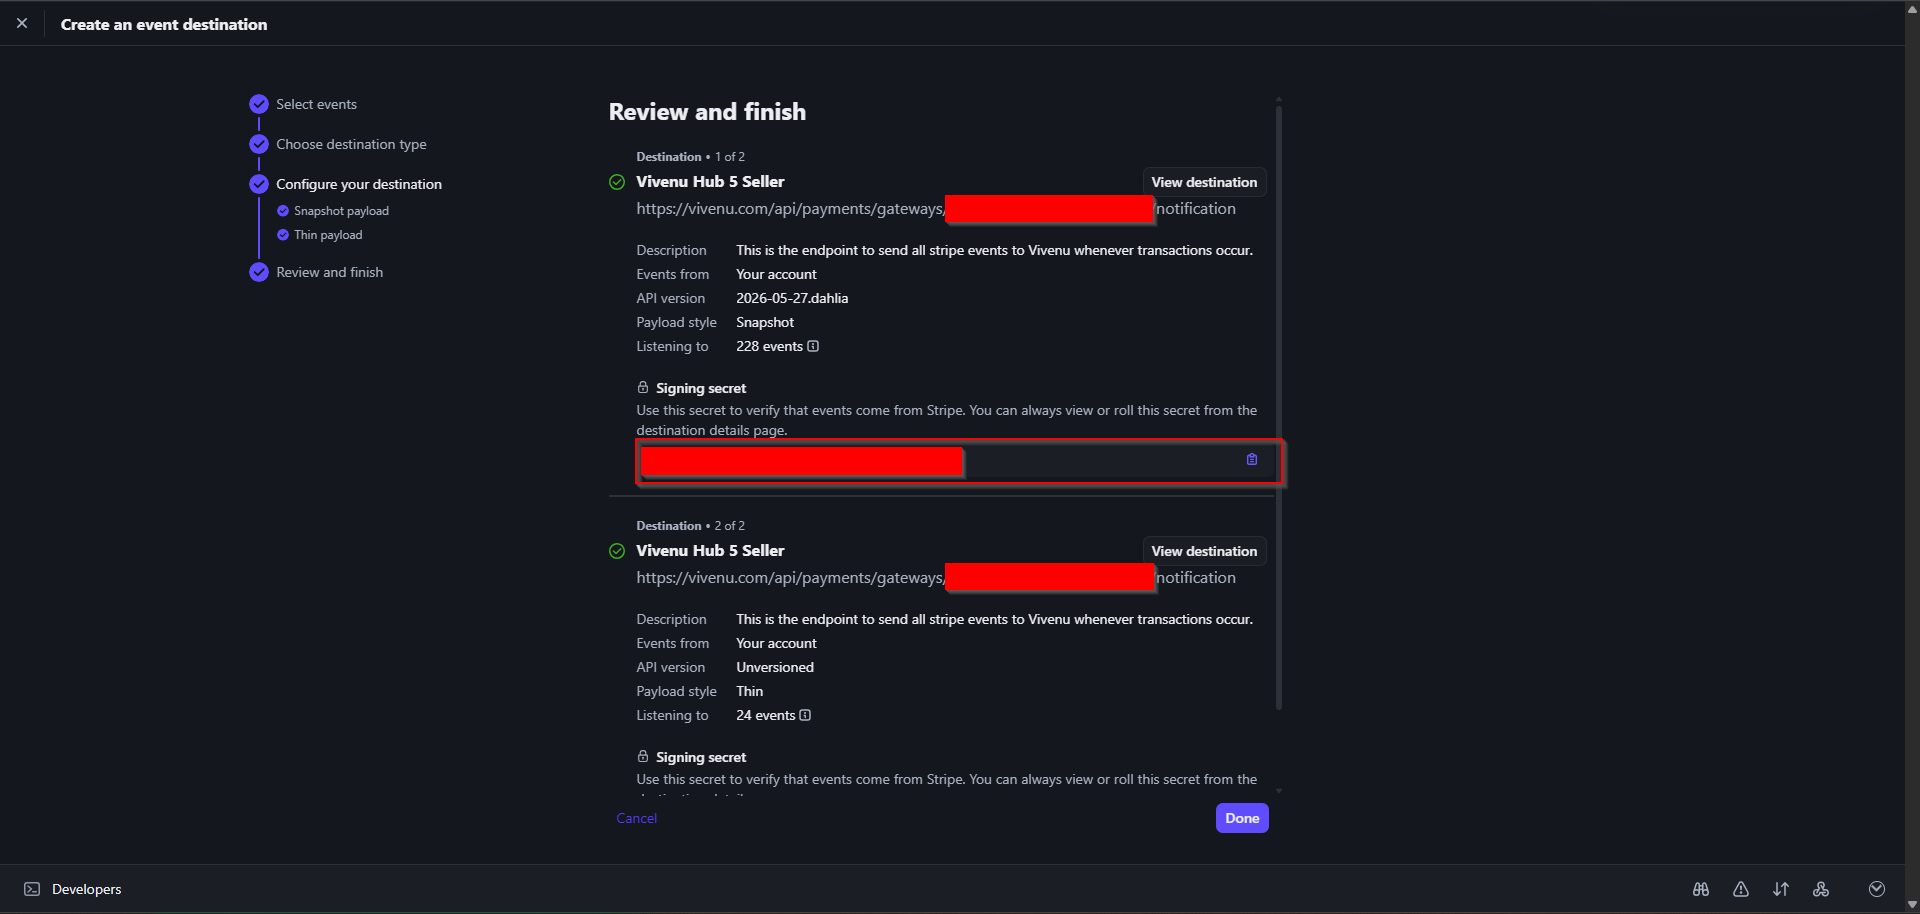
Configure the destination

Set the destination name to 
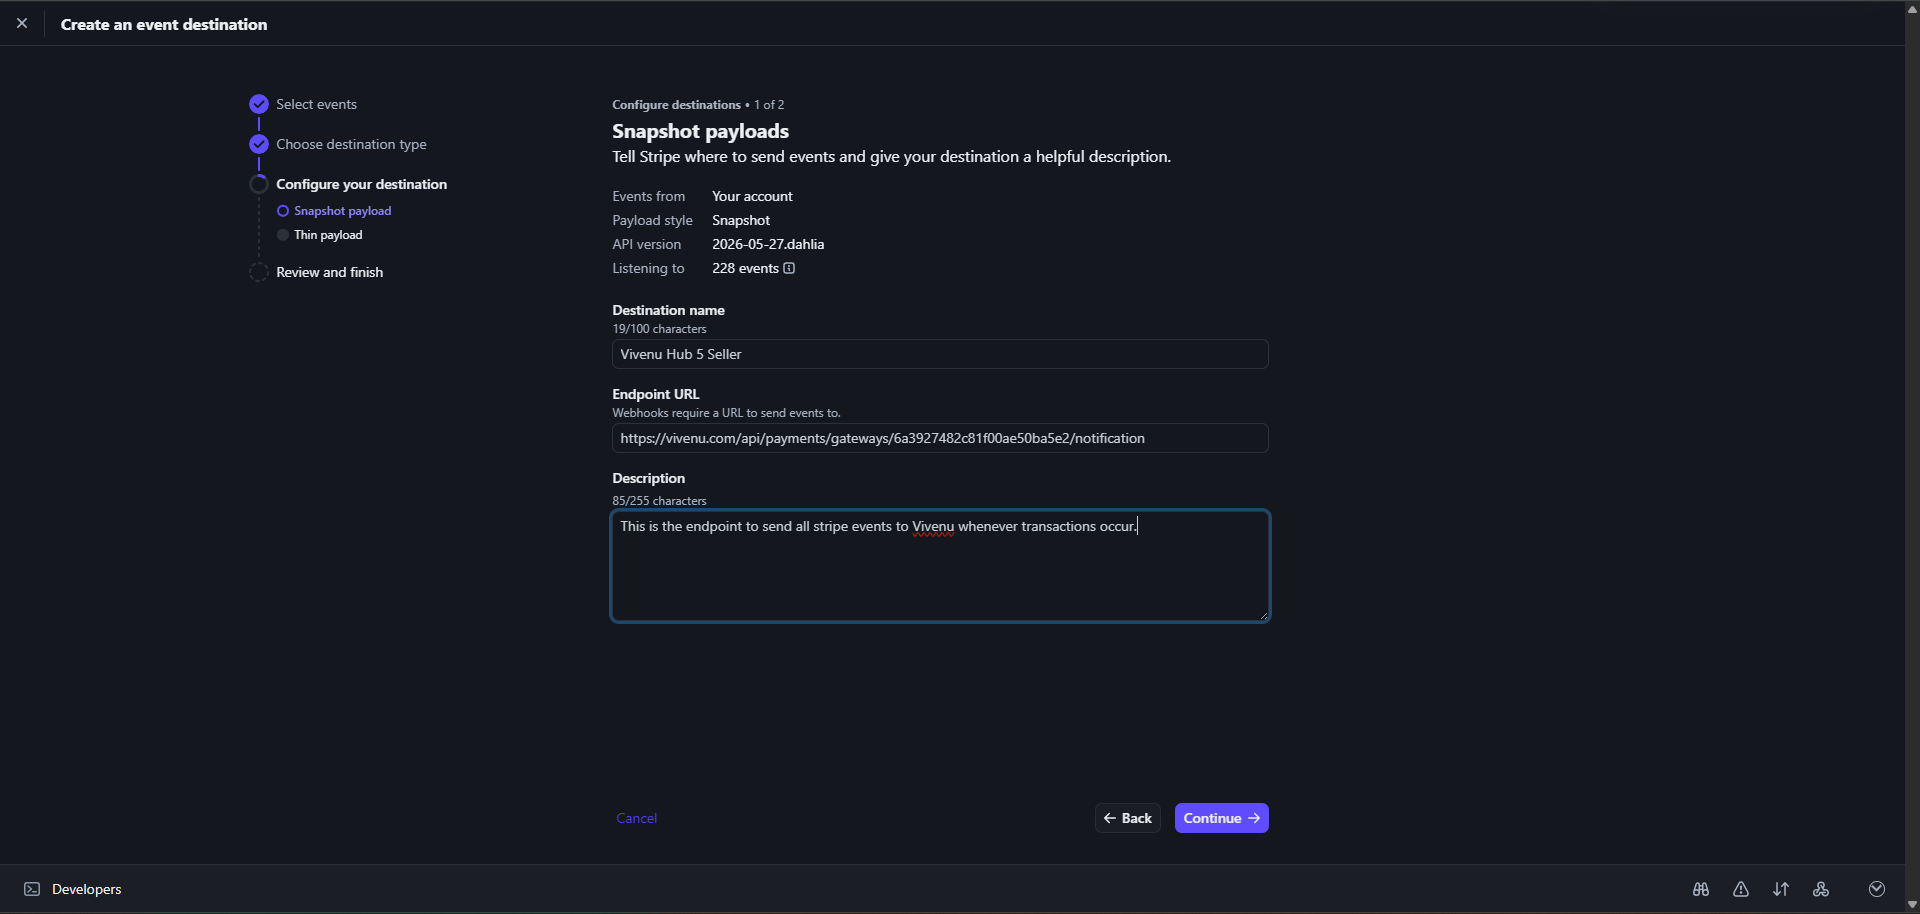
Vivenu Hub # Seller, replacing # with the hub number.Paste the URL copied from Vivenu into Endpoint URL.Enter the following into Description:
This is the endpoint to send all stripe events to Vivenu whenever transactions occur
Continue to proceed.The Stripe webhook payload configuration screen
7

Copy the signing secret

Copy the Signing Secret for the Snapshot payload style and paste it into the Webhook Signing Secret field on Vivenu.Pasting the signing secret into Vivenu
8

Validate and save on Vivenu

Click Validate & Save to complete the Vivenu configuration.
9

Finish on Stripe

Return to Stripe, review the details, and click Done if everything looks correct.Reviewing and completing the Stripe webhook setup
Last modified on June 23, 2026